


Would you like to take part in the Issue 3 Fat Quarterly Designer Challenge?
We would love to have you contibute so please lave a comment on this post and we will pick out two lucky readers.
Also, do you have a interest in all things Facebook?
We are looking for a someone who can manage our Facebook page. If this is something that you may be interested in or would like more details on then drop us an email.
fatquarterly@googlemail.com
Showing posts with label designer challenge. Show all posts
Showing posts with label designer challenge. Show all posts
Friday, September 3, 2010

Tuesday, August 3, 2010
Jennie's Flying Geese Tutorial
Jennie's fabulous block "breaking Out" was the winner of the Fat Quarterly Reader Designer Challenge from Issue 1 - Fresh Start.
Jennie originally designed her block for the Pillow Talk Swap but now she has very kindly written up a tutorial for you to make one of your own! If you make this block we would love it if you upload photos of your block to our Flickr group as we would love to see!
Tutorial for “Breaking Out” - a flying geese block
designed by Jennie Finch Schauer
Materials (for one block):
12- 2.5” x 4.5” print rectangles
24- 2.5” background squares
4- 2.5 x 6.5” background rectangles
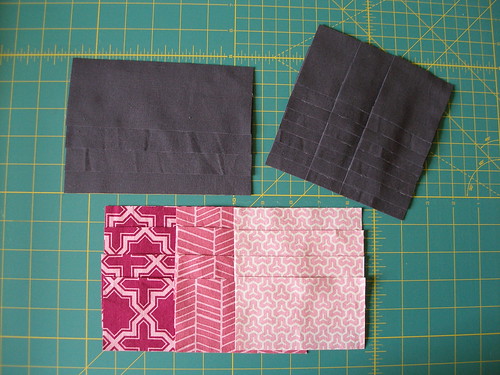
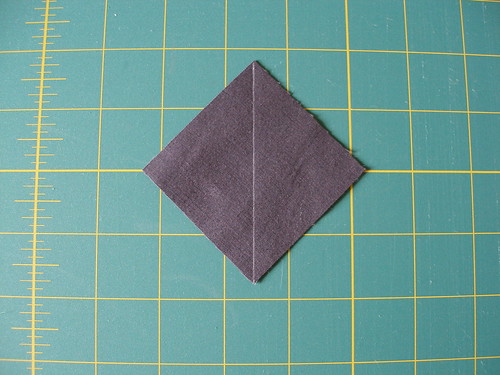
Draw a line diagonally across each of the 24- 2.5” background squares:
Place the square on top of a print rectangle, making sure the line is as shown in the photo below:
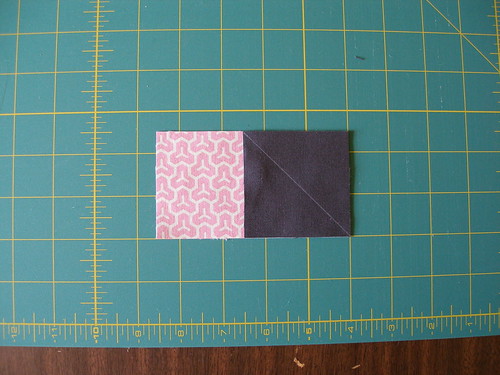
Sew on the line, then trim ¼” away from the line towards the outside of the block. Press towards the background (the grey, in this example):
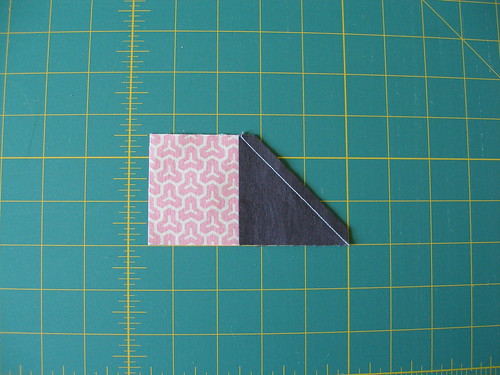
Take a second 2.5” background square and position it as shown in the photo below:
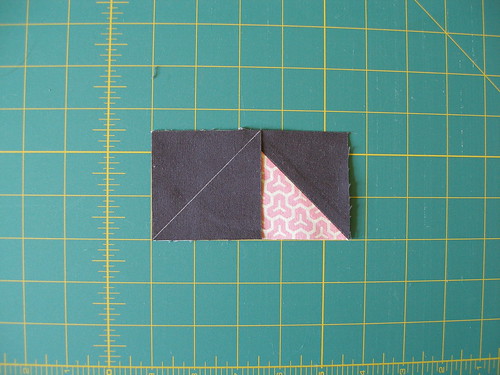
Sew on the line, then trim ¼” away from the line towards the outside of the block (see photo):
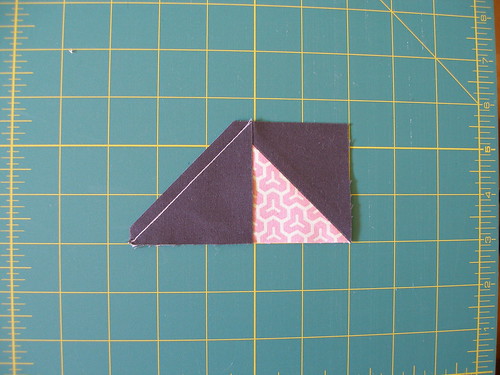
Press towards the background (the grey, in this example):
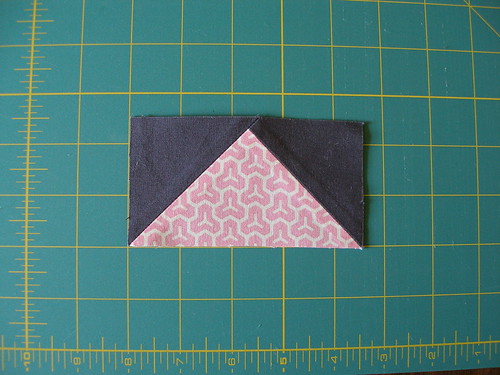
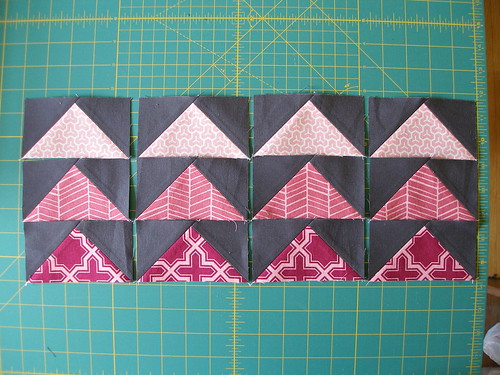
Repeat these steps to make 12 flying geese blocks. : Sew the flying geese into 4 groups of 3 geese each. Then lay them out!
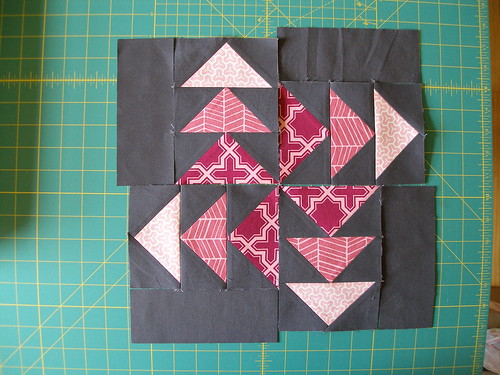
You can spin them to the right…
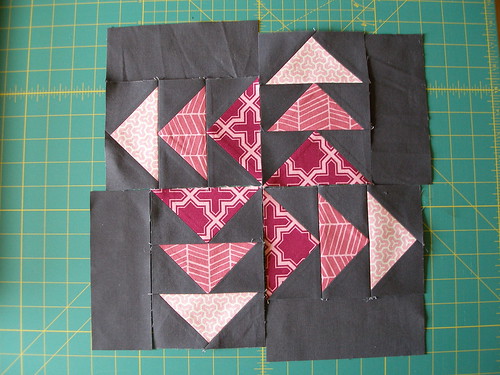
Or to the left…
Once you decide which way you’d like the geese to spin, place the 2.5” x 6.5” rectangles on the outside edge of the flying geese units:
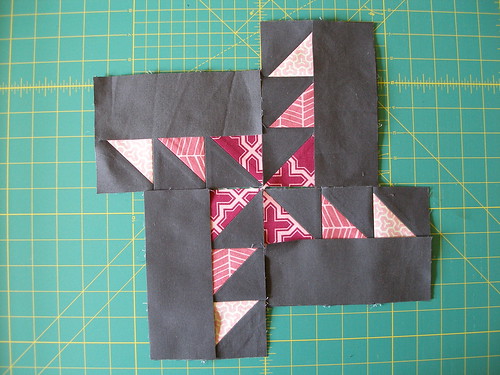
Sew the 2.5” x 6.5” rectangles to the outside edge of each of the flying geese units, pressing towards the background rectangle. Sew the quarters into your finished block!
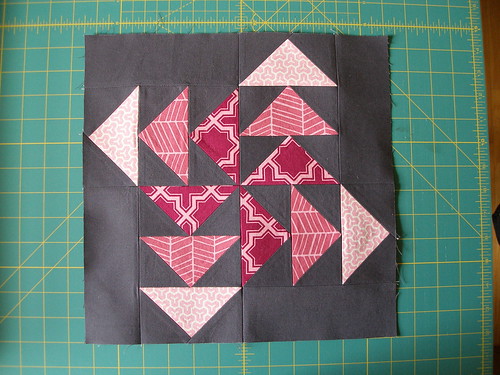
Jennie originally designed her block for the Pillow Talk Swap but now she has very kindly written up a tutorial for you to make one of your own! If you make this block we would love it if you upload photos of your block to our Flickr group as we would love to see!
Tutorial for “Breaking Out” - a flying geese block
designed by Jennie Finch Schauer
Materials (for one block):
12- 2.5” x 4.5” print rectangles
24- 2.5” background squares
4- 2.5 x 6.5” background rectangles
Draw a line diagonally across each of the 24- 2.5” background squares:
Place the square on top of a print rectangle, making sure the line is as shown in the photo below:
Sew on the line, then trim ¼” away from the line towards the outside of the block. Press towards the background (the grey, in this example):
Take a second 2.5” background square and position it as shown in the photo below:
Sew on the line, then trim ¼” away from the line towards the outside of the block (see photo):
Press towards the background (the grey, in this example):
Repeat these steps to make 12 flying geese blocks. : Sew the flying geese into 4 groups of 3 geese each. Then lay them out!
You can spin them to the right…
Or to the left…
Once you decide which way you’d like the geese to spin, place the 2.5” x 6.5” rectangles on the outside edge of the flying geese units:
Sew the 2.5” x 6.5” rectangles to the outside edge of each of the flying geese units, pressing towards the background rectangle. Sew the quarters into your finished block!
Sunday, May 16, 2010
Windowpanes: 2 blocks, 8 ways
Thanks for all of your nice words about our Saffron Craig designer block challenge! The blocks were a lot of fun to make, and we have something special planned for them. Stay tuned!
In the meantime, I promised I would share my pattern for the windowpane blocks. I actually drew up two designs for the block, but only used the first one. The best thing about these blocks is that each one is really four designs, because you can rotate them 90 degrees at a time for a completely different look.
So the next time you've got some awesome prints to fussy cut, consider the Fat Quarterly windowpane blocks! And be sure to post them in our Flickr pool.
NOTE: all sashing strips are cut at 1.5" wide unfinished, for 1" finished sashing.
Windowpane block A:
 Windowpane block B:
Wednesday, May 12, 2010
Saffron Craig - Designer block challenge
Here at FQ HQ, we set ourselves a fun challenge to see what we could each come up with by using Saffron Craig's new 'Forest Elementals' range to create a quilt block. Here are the results with a little explanation from each of us on how we went about creating our blocks.
Kate
 When thinking about this challenge I wanted to keep the overall block very simple but I also wanted to feature a little bit of each print.The result is a strip pinwheel block that measures 12.5" square. This block is also a great way to use up some of those long, narrow pieces in the scrap basket.To make this block:1: Cut 2 x 7" squares from a solid.2: Piece 15 1.5" x 7" strips together, press.3: Then cut the strip piece into 2 x 7" squares.4: Construct two HST units (As per First Issue) which will give you 4 7" blocks and piece into a pinwheel.
Katy
 I really love the refreshing colours of these fabrics - the purple and orange is such a change from what has been the norm lately.Although the darker fabrics have large scale designs I wanted to show that by cutting them up and using the colours rather than the designs you can still get a striking effect.
Aneela
 One of the great things about this collection is the range of tones from white through to dark purple and black. This is the key characteristic that makes all the blocks here work so well.For my block I used the light tonal value prints to cut 9 squares, then added in a curved corner from the darker prints on the top left and bottom right corners of each of the nine patches before stitching them all together. I've seen this done before with a triangle in each corner but I wanted to have a little fun and play with curved corners for my block.
Tacha


Kate
When thinking about this challenge I wanted to keep the overall block very simple but I also wanted to feature a little bit of each print.The result is a strip pinwheel block that measures 12.5" square. This block is also a great way to use up some of those long, narrow pieces in the scrap basket.To make this block:1: Cut 2 x 7" squares from a solid.2: Piece 15 1.5" x 7" strips together, press.3: Then cut the strip piece into 2 x 7" squares.4: Construct two HST units (As per First Issue) which will give you 4 7" blocks and piece into a pinwheel. Katy
I really love the refreshing colours of these fabrics - the purple and orange is such a change from what has been the norm lately.Although the darker fabrics have large scale designs I wanted to show that by cutting them up and using the colours rather than the designs you can still get a striking effect.Aneela
One of the great things about this collection is the range of tones from white through to dark purple and black. This is the key characteristic that makes all the blocks here work so well.For my block I used the light tonal value prints to cut 9 squares, then added in a curved corner from the darker prints on the top left and bottom right corners of each of the nine patches before stitching them all together. I've seen this done before with a triangle in each corner but I wanted to have a little fun and play with curved corners for my block.Tacha
I couldn't decide between making a traditional or a modern block. The colours in this fabric range are so bold and striking that they scream modern quilt. I love the deer and so he had to be framed! I used a strip of Heather Bailey Nicey Jane to balance the yellow/orange of the deer.But I couldn't get the idea of making a more traditional block out of my head. Rather than one large block I made 4 smaller Greek Squares and added in more of Heather Bailey's Nicey Jane and some black solid.
Brioni
 As some of the fabrics had a larger print i wanted a pattern that would showcase the fabrics as much as possible. The high contrast between the light and dark fabrics shouted "whirly gigs" at me.
We would love to see what kind of block you could come up with from using Saffron's fabrics. Show us by uploading your own version to our flickr group.
Brioni
As some of the fabrics had a larger print i wanted a pattern that would showcase the fabrics as much as possible. The high contrast between the light and dark fabrics shouted "whirly gigs" at me. John
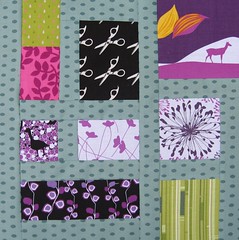
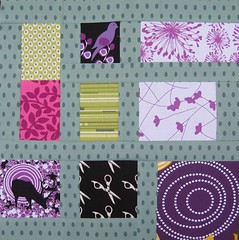
Saffron Craig's fabric designs are, for me, the definition of inspirational! Something about them just makes me want to create something. With this particular line, I was immediately struck by the vivid colors -- I mean, those pinks and purples are vibrant! As lovely as they are, my mind immediately called for CONTRAST. So I selected a few coordinating prints in shades of green as well as the teal dots from the new "Freebird" line by Moda to try to balance them out. Another great thing about Saffron's designs are that they are PERFECT for fussy cutting. So I drew up this quick & easy windowpane design to really show off some of the illustrations. I'm happy to share the block design on a future blog post in case you're looking for a good block to show off some prints.
Saffron Craig's fabric designs are, for me, the definition of inspirational! Something about them just makes me want to create something. With this particular line, I was immediately struck by the vivid colors -- I mean, those pinks and purples are vibrant! As lovely as they are, my mind immediately called for CONTRAST. So I selected a few coordinating prints in shades of green as well as the teal dots from the new "Freebird" line by Moda to try to balance them out. Another great thing about Saffron's designs are that they are PERFECT for fussy cutting. So I drew up this quick & easy windowpane design to really show off some of the illustrations. I'm happy to share the block design on a future blog post in case you're looking for a good block to show off some prints.
We would love to see what kind of block you could come up with from using Saffron's fabrics. Show us by uploading your own version to our flickr group.
Don't forget our Saffron Craig giveaway ends this Saturday.
Please see this post for details.
Subscribe to:
Posts (Atom)